我们的目标是用 WordPress 制作纯展示型企业网站。上篇简单学习了 WordPress 主题开发,知道了如何套前端模版了。但是数据哪儿来呢?默认的 WordPress 是只是个博客程序,一般企业站还需要新闻、产品等资料,得扩展 WordPress 后台,这种扩展就是指开发我们自己的 WordPress 插件。
目标
后台起码需要这些功能:
- 加全局设置,如公司名称、联系方式、ICP 备案号;
- 加自定义文章类型,比如图书包含书名、作者、出版社、书封面图、介绍(富文本框)、组图(相册)、在售状态。
- 给文章加分类,比如图书分类
最简单的插件
传统主题中在 style.css 顶部注释中声明主题,插件也类似,在插件目录
wp-content/plugins 下新建 PHP 文件,配上注释,一个插件就完成了:
1<?php2// wp-content/plugins/xcy/xcy.php3/*4 * Plugin Name: My First Plugin5 * Description: This is my first WordPress plugin.6 * Version: 0.17 * Author: Xu Chunyang8 * Author URI: https://xuchunyang.cn9 */之后在后台的插件菜单,可以看到这个新插件,再激活它。
全局设置
网站需要诸如公司名称、联系方式和 ICP 备案号之类的信息,需要在后台配置,方便前端统一调用。
添加菜单
首先用 add_menu_page 在后台管理界面加一个菜单:
1<?php 2add_action( 3 'admin_menu', 4 fn() => add_menu_page( 5 '页面标题', 6 '菜单标题', 7 'manage_options', // 关联的权限,拥有该权限的用户才能访问本页面,https://wordpress.org/support/article/roles-and-capabilities/#manage_options 8 'page_slug', 9 fn() => print( '<h1>' . get_admin_page_title() . '</h1>' ), // 页面内容,后面会加表单10 'dashicons-admin-settings' // 菜单小图标,https://developer.wordpress.org/resource/dashicons/#admin-settings11 ),12);页面暂时只有个标题,稍后会加用来管理设置的表单。
添加设置
WordPress 提供了选项和设置 API。选项 API
是一个简单键值对系统,数据在数据库表 wp_options 中,提供了
add/get/update/delete_option 的 PHP API:
1MySQL root@(none):(none)> use wordpress 2You are now connected to database "wordpress" as user "root" 3Time: 0.000s 4MySQL root@(none):wordpress> \dt wp_options 5+--------------+---------------------+------+-----+---------+----------------+ 6| Field | Type | Null | Key | Default | Extra | 7+--------------+---------------------+------+-----+---------+----------------+ 8| option_id | bigint(20) unsigned | NO | PRI | <null> | auto_increment | 9| option_name | varchar(191) | NO | UNI | | |10| option_value | longtext | NO | | <null> | |11| autoload | varchar(20) | NO | MUL | yes | |12+--------------+---------------------+------+-----+---------+----------------+13Time: 0.015s14MySQL root@(none):wordpress> select * from wp_options limit 3;15+-----------+-------------+-----------------------------+----------+16| option_id | option_name | option_value | autoload |17+-----------+-------------+-----------------------------+----------+18| 1 | siteurl | http://localhost:8080 | yes |19| 2 | home | http://localhost:8080 | yes |20| 3 | blogname | Learn WordPress Development | yes |21+-----------+-------------+-----------------------------+----------+有了选项,还需要在后台管理他们,意味着需要显示和处理选项,而设置 API 就是用来协助我们管理选项的。这个设置 API 的流程是:
Option -> Form Field -> Section -> Page
下面加了三个选项,对应三个 <input>,在一个 Page 的 一个 Section 中:
1<?php 2add_action( 3 'admin_init', 4 function () { 5 add_settings_section( 6 'xcy_basic_settings_section', 7 '基本设置', 8 fn() => print( '<p>一些基本的设置</p>' ), 9 'xcy-website-settings-page',10 );11 12 $options = [13 [14 'id' => 'xcy_company_name',15 'description' => '公司名称',16 ],17 [18 'id' => 'xcy_telephone_number',19 'description' => '电话号码',20 ],21 [22 'id' => 'xcy_icp_record',23 'description' => 'ICP 备案号',24 ],25 ];26 27 foreach ( $options as $option ) {28 register_setting( 'xcy_option_group', $option['id'] );29 add_settings_field(30 $option['id'],31 $option['description'],32 function () use ( $option ) {33 $value = get_option( $option['id'] );34 ?>35 <input id="<?= $option['id'] ?>"36 name="<?= $option['id'] ?>"37 type="text"38 class="regular-text"39 value="<?= isset( $value ) ? esc_attr( $value ) : '' ?>">40 <?php41 },42 'xcy-website-settings-page',43 'xcy_basic_settings_section',44 [45 'label_for' => $option['id'],46 ],47 );48 }49 }50);51 52add_action(53 'admin_menu',54 function () {55 add_menu_page(56 '网站设置',57 '网站设置',58 'manage_options',59 'xcy-website-settings-slug',60 function () {61 if ( isset( $_GET['settings-updated'] ) ) {62 add_settings_error( 'xcy_messages', 'xcy_message', '设置已保存!', 'updated' );63 }64 settings_errors( 'xcy_messages' );65 ?>66 <div class="wrap">67 <h1><?= esc_html( get_admin_page_title() ) ?></h1>68 <form action="options.php" method="post">69 <?php70 settings_fields( 'xcy_option_group' );71 do_settings_sections( 'xcy-website-settings-page' );72 submit_button( 'Save Settings' );73 ?>74 </form>75 </div>76 <?php77 },78 );79 },80);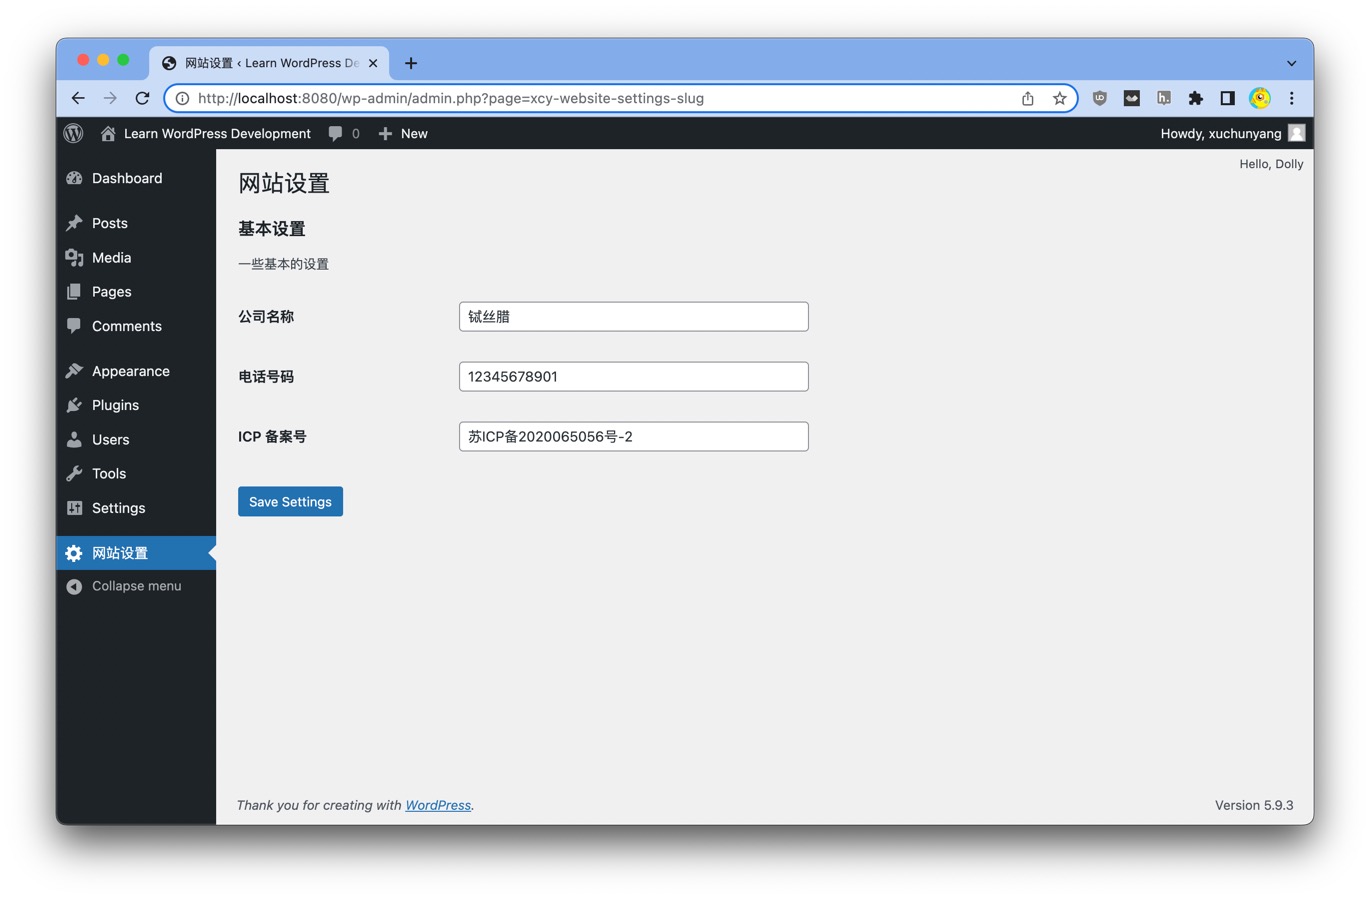
自定义文章类型
不同类似内容需要的信息不同,新闻有标题和内容,图书有书名、作者和出版社,产品有名称和参数。为了便于管理不同类型的内容,需要自定义文章类型。
新增自定义文章类型
使用 register_post_type 注册一个新的文章类型:
1<?php 2add_action( 'init', fn() => register_post_type( 'xcy_book', [ 3 'labels' => [ 4 'name' => '图书', 5 'singular_name' => '图书', 6 'add_new' => '新增', 7 'add_new_item' => '新增图书', 8 ], 9 'public' => true,10 'has_archive' => true,11 'supports' => [ 'title', 'editor', 'thumbnail' ],12 'menu_icon' => 'dashicons-book',13] ) );- 类型名称
xcy_book加了前缀,而不是简单的book,这是为了避免可能的冲突 -
supports参数控制 WordPress 自带的一些功能,这里用thumbnail当作书的封面,注意主题要添加相关支持,不然不会显示,方法是:
1add_action( 'after_setup_theme', fn() => add_theme_support( 'post-thumbnails' ) );好了,现在我们就可以管理图书了:

添加自定义字段
光有名称和封面还不够,图书起码还有作者、出版社、ISBN,也就是需要添加自定义字段。
WordPress 里 wp_posts
只定义了几个字段,要新增字段也不用修改数据库结构,而是通过专门的
wp_postmeta 表,一个 Post 对应任意多个 Metadata:
1MySQL root@(none):wordpress> \dt wp_postmeta2+------------+---------------------+------+-----+---------+----------------+3| Field | Type | Null | Key | Default | Extra |4+------------+---------------------+------+-----+---------+----------------+5| meta_id | bigint(20) unsigned | NO | PRI | <null> | auto_increment |6| post_id | bigint(20) unsigned | NO | MUL | 0 | |7| meta_key | varchar(255) | YES | MUL | <null> | |8| meta_value | longtext | YES | | <null> | |9+------------+---------------------+------+-----+---------+----------------+我们把图书需要的作者、出版社、ISBN等数据也放到这张表里。虽然我可以用 WordPress 自带的 Custom Field 录入这些信息,但是客户可不知道录入哪些信息以及怎么录入。所以我们自定义元数据框[^meta_box],把要录入的项目显示出来,方便用户添加。
[^meta_box] 元数据框 (Meta Box) 就是编辑页面那一个一个可以隐藏、移动的卡片
使用 add_meta_box 来给我们新增的图书类型添加信息框:
1<?php 2// 图书信息框 3$xcy_book_fields = [ 4 [ 5 'id' => '_xcy_book_author', 6 'description' => '作者', 7 ], 8 [ 9 'id' => '_xcy_book_publisher',10 'description' => '出版社',11 ],12 [13 'id' => '_xcy_book_isbn',14 'description' => 'ISBN',15 ],16];17add_action( 'add_meta_boxes', fn() => add_meta_box(18 'xcy_book_basic_info',19 '基本信息',20 function ( $post ) {21 global $xcy_book_fields;22 ?>23 <div style="display: grid; grid-template-columns: auto 1fr; gap: 2rem 1rem; align-items: center; margin: 1rem 0">24 <?php25 foreach ( $xcy_book_fields as $field ) {26 $value = get_post_meta( $post->ID, $field['id'], true );27 ?>28 <label for="<?= $field['id'] ?>"><?= $field['description'] ?></label>29 <input id="<?= $field['id'] ?>"30 name="<?= $field['id'] ?>"31 type="text"32 required33 value="<?= isset( $value ) ? esc_attr( $value ) : '' ?>">34 <?php35 }36 ?>37 </div>38 <?php39 },40 'xcy_book',41) );光显示还不行,还需要把数据保存:
1<?php2add_action( 'save_post_xcy_book', function ( $post_id ) {3 global $xcy_book_fields;4 foreach ( $xcy_book_fields as $field ) {5 if ( array_key_exists( $field['id'], $_POST ) ) {6 update_post_meta( $post_id, $field['id'], $_POST[ $field['id'] ] );7 }8 }9} );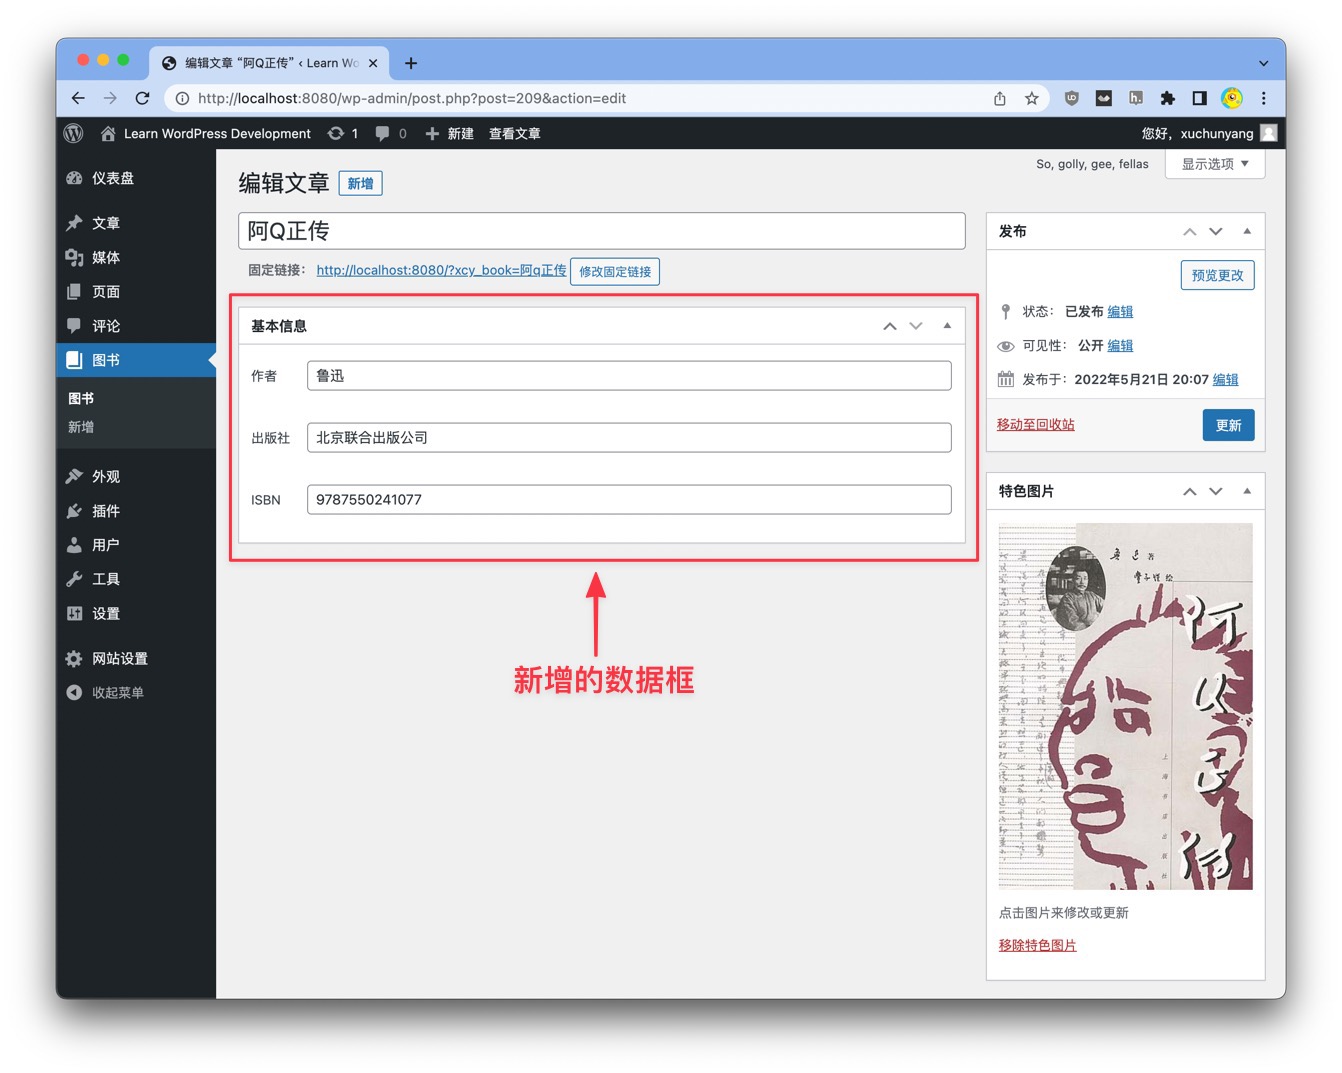
现实中除了文本字段,往往还需要其他的类型字段,比如 checkbox, radio/toggle, select, textarea, wysiwyg editor, image, file, gallery, relation 等,自己一一实现这些可不简单。怪不得 ACF 和 Meta Box 这样的 Custom Field 插件下载量非常大,我试过 ACF 插件,确实方便,好奇它的付费版中的 Gallery, Repeater 是怎样,估计也很有用。但是一来也没啥钱买插件,二来我们的要求不高,能自己写就自己写。
用 WordPress 自带的媒体管理器上传图片
假设图书还要一张背面照,这张图片该如何上传呢?可以直接用 WordPress 媒体管理器(介绍, media JS APIs)处理上传。
首先引入 Media JS 库:
1<?php2// add media js api3add_action( 'admin_enqueue_scripts', fn( $hook_suffix ) => wp_enqueue_media() );然后页面里监听 select 事件就能获得附件了:
1const frame = wp.media({ 2 title: '选择或上传封底', 3 multiple: false, 4}); 5 6frame.on('select', () => { 7 console.log(frame.state().get('selection').first().toJSON()); 8}) 9 10frame.open();我们使用 Alpine.js 来处理上传的逻辑:
1<?php 2$img_id = get_post_meta( $post->ID, '_xcy_book_back_cover', true ); 3$img_url = $img_id ? ( wp_get_attachment_image_url( $img_id, 'full' ) ?: '' ) : ''; 4?> 5<script defer src="https://unpkg.com/alpinejs@3.x.x/dist/cdn.min.js"></script> 6<div x-data="{ 7 id: '<?= $img_id ?>', 8 src: '<?= $img_url ?>', 9 upload() {10 const frame = wp.media({11 title: '选择或上传封底',12 multiple: false,13 });14 15 frame.on('select', () => {16 const attachment = frame.state().get('selection').first().toJSON();17 console.log(attachment);18 this.id = attachment.id;19 this.src = attachment.url;20 });21 22 frame.open();23 } }">24 <input type="hidden" :value="id" name="_xcy_book_back_cover">25 <label>封底图片</label>26 <div>27 <button type="button" x-text=" id ? '替换图片' : '上传图片'" @click="upload"></button>28 <button x-show="id" type="button" @click="id = '', src = ''">删除图片</button>29 </div>30 <template x-if="src">31 <figure>32 <img :src="src" style="max-width: 100%">33 </figure>34 </template>35</div>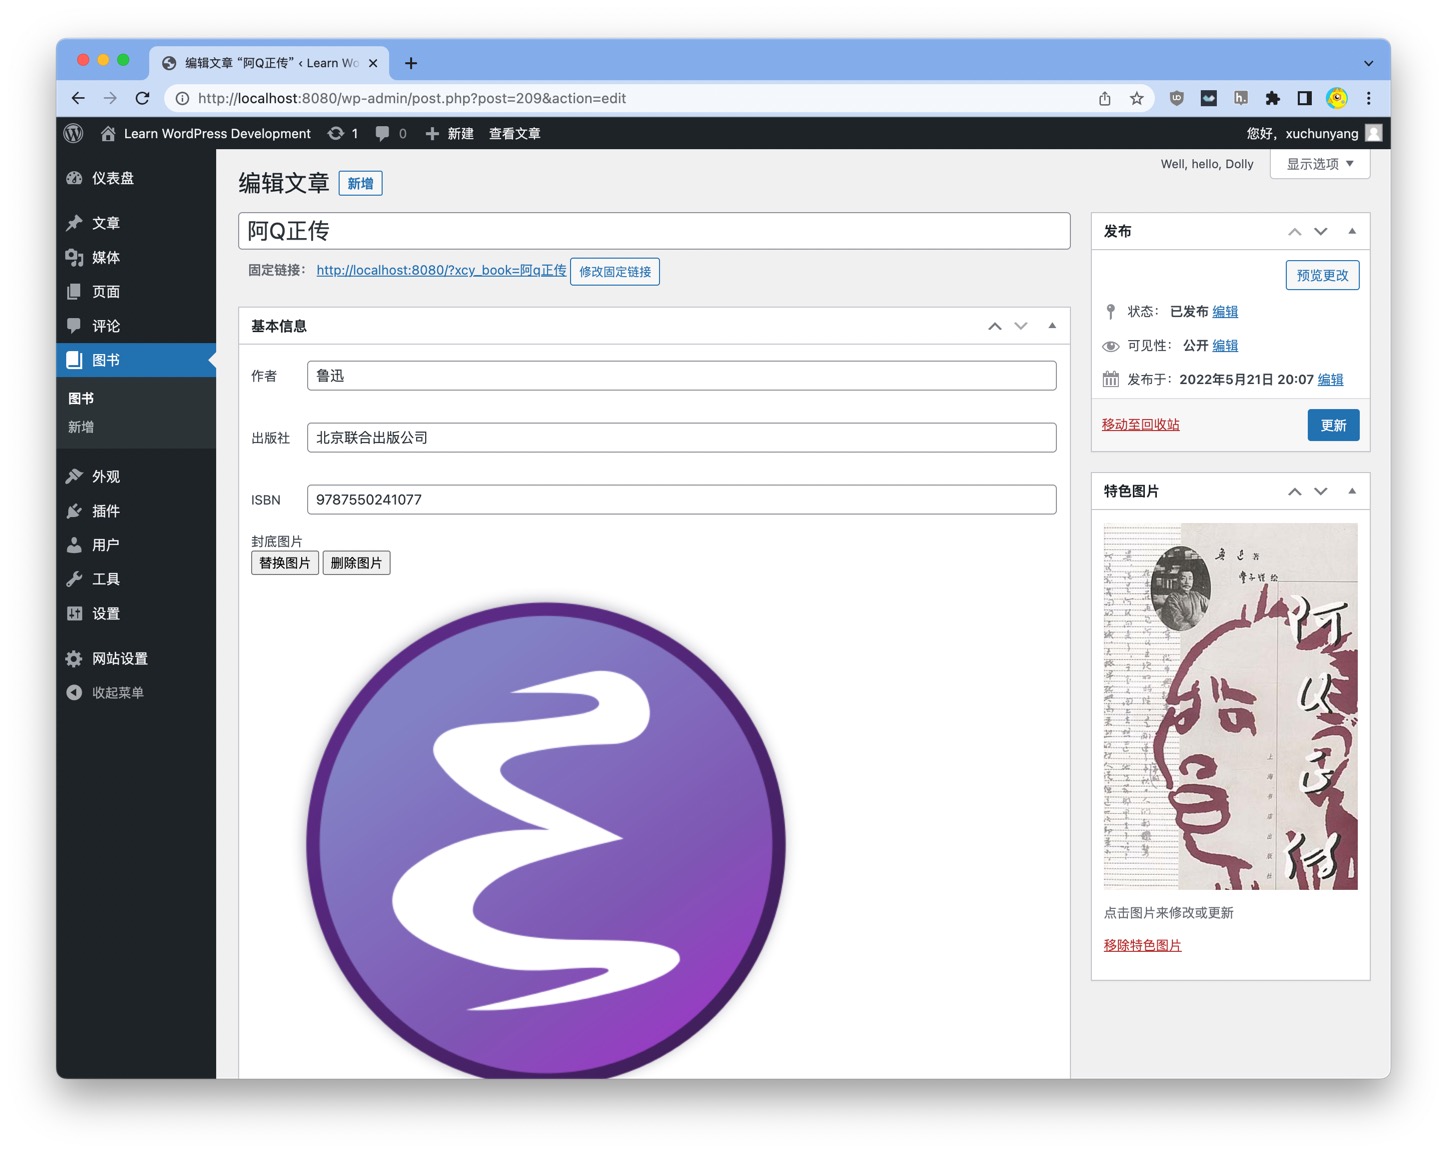
多张图片也算是 Repeater,也用类似的方法。
最后不要忘记用 update_post_meta 保存数据。
在列表页显示自定义字段
默认的列表页光秃秃的,只有标题和日期:
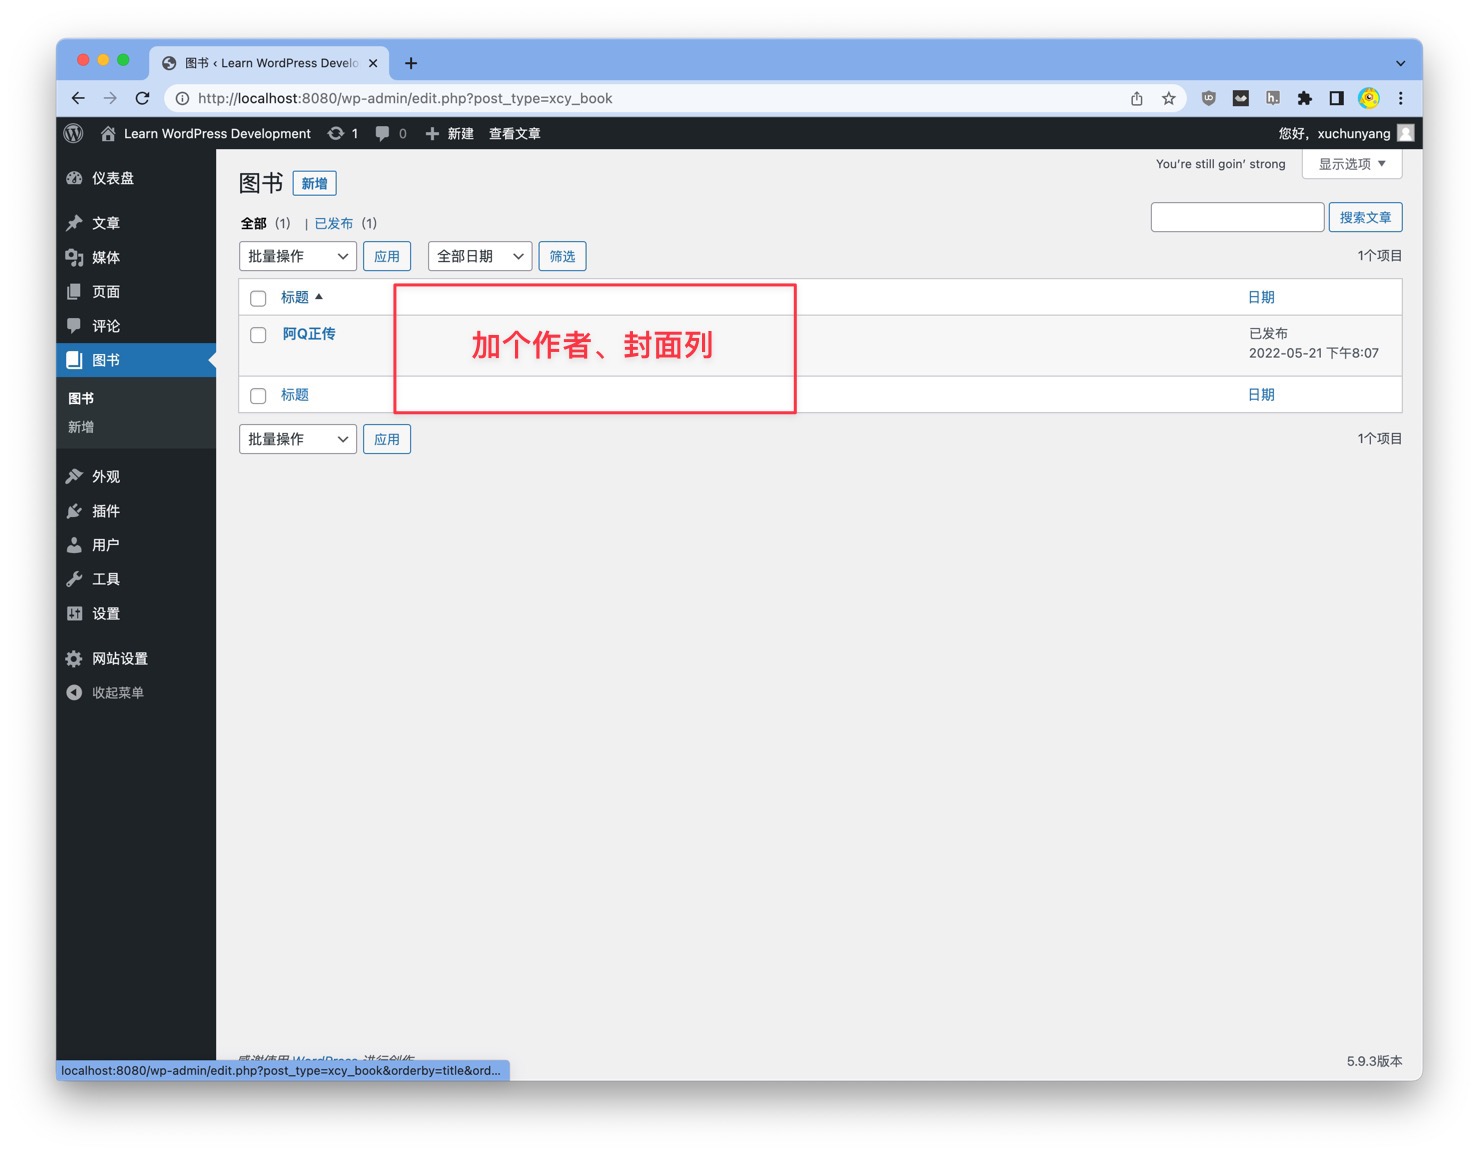
但我们想显示书名、作者、图片和日期:
- 用
manage_{$post_type}_posts_columns添加【作者】和【封面】两列,其余的cb/title/date是原来自带的,正好我们也需要; - 用
manage_{$post->post_type}_posts_custom_column计算这两个列的值。
1<?php 2add_filter( 'manage_xcy_book_posts_columns', function ( $columns ) { 3 // do_action( 'qm/debug', $columns ); 4 5 return [ 6 'cb' => '<input type="checkbox">', 7 'title' => '书名', 8 '_xcy_book_author' => '作者', 9 'cover' => '封面',10 'date' => '日期',11 ];12} );13 14add_action( 'manage_xcy_book_posts_custom_column', function ( $column_name, $post_id ) {15 switch ( $column_name ) {16 case '_xcy_book_author':17 echo get_post_meta( $post_id, '_xcy_book_author', true ) ?: 'No Author';18 break;19 case 'cover':20 $url = get_the_post_thumbnail_url( $post_id );21 echo "<img src='$url' style='max-width: 100px'>";22 break;23 }24}, 10, 2 );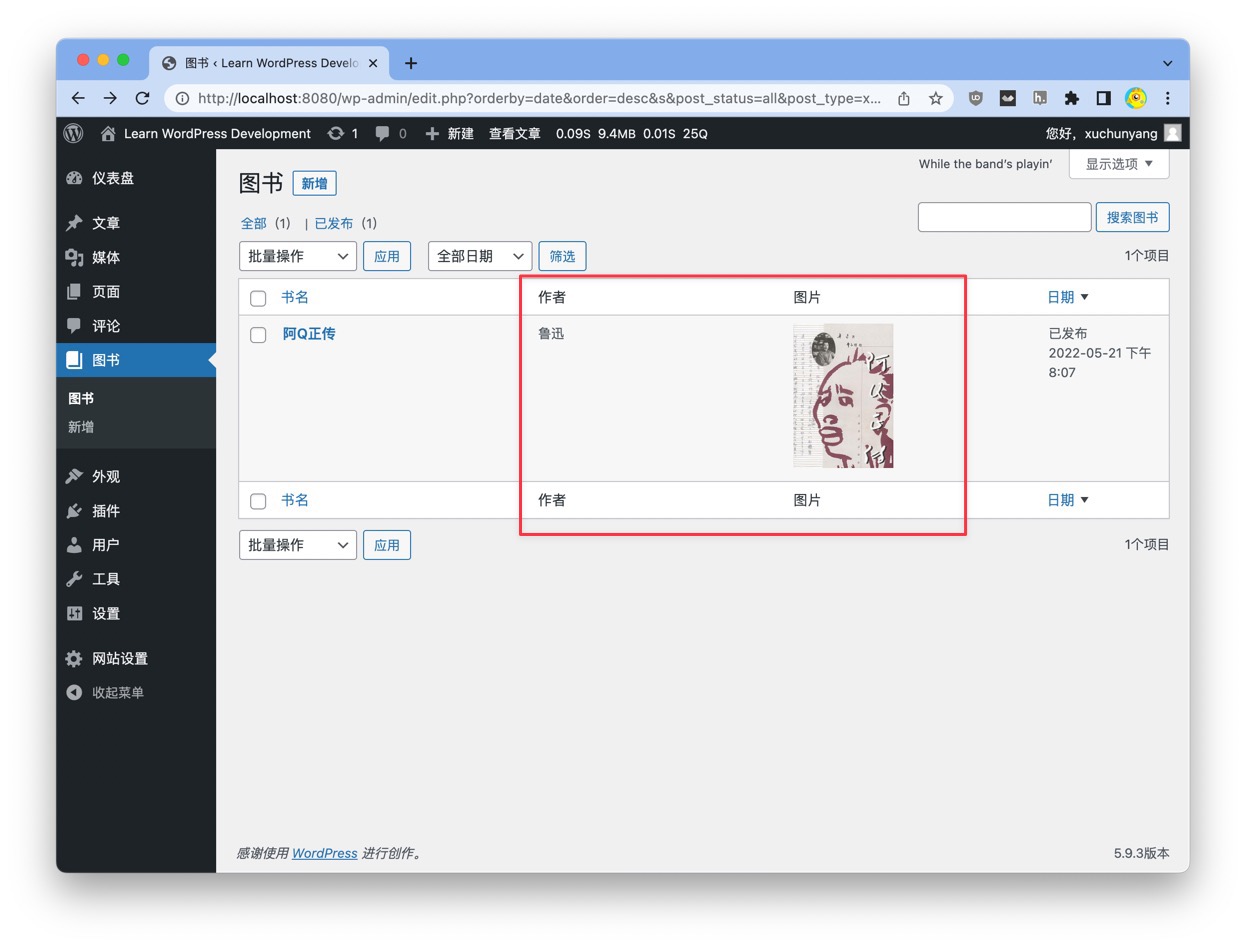
新增图书分类
可以管理图书了,我们还想要个分类功能,为了避免冲突,用
register_taxonomy 添加一个新分类:
1<?php 2// 分类 3add_action( 'init', function () { 4 register_taxonomy( 'xcy_book_category', [ 'xcy_book' ], [ 5 'hierarchical' => true, 6 'labels' => [ 7 'name' => '图书分类', 8 'singular' => '图书分类', 9 ],10 'public' => true,11 'show_admin_column' => true, // 列表页显示分类12 ] );13} );加几个分类后,编辑图书界面就可以是用分类了:
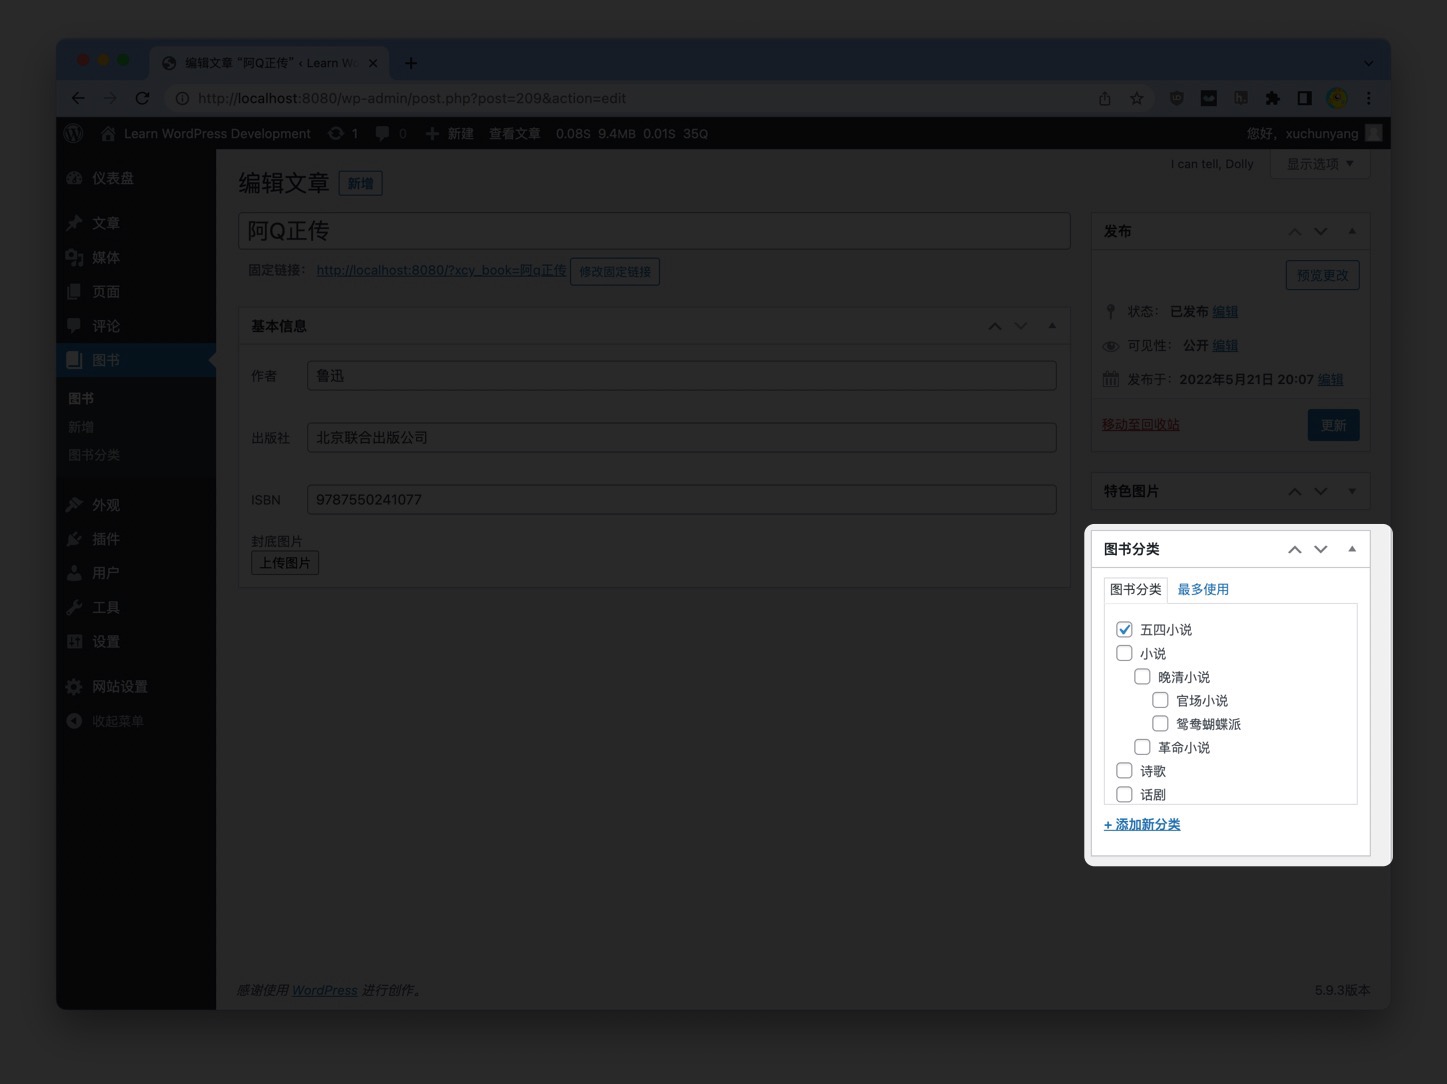
但默认分类的不能修改顺序,也不能限制每篇文章最多一个分类。